Blog

  • Is WhatsApp Plus Safe? A Complete Guide

    Is WhatsApp Plus Safe? A Complete Guide

    WhatsApp Plus is one of those apps that sounds tempting the moment you hear about it. It promises extra customization, more privacy controls, larger file sharing, hidden online status options, and features that the official WhatsApp app does not provide. But before installing it, there is one important question to answer: is WhatsApp Plus safe?

    TLDR: WhatsApp Plus is not considered safe because it is an unofficial modified version of WhatsApp and is not available through trusted app stores like Google Play or the Apple App Store. It may expose your data, violate WhatsApp’s terms of service, and increase the risk of account bans or malware. If privacy and security matter to you, the official WhatsApp app is the safer choice.

    What Is WhatsApp Plus?

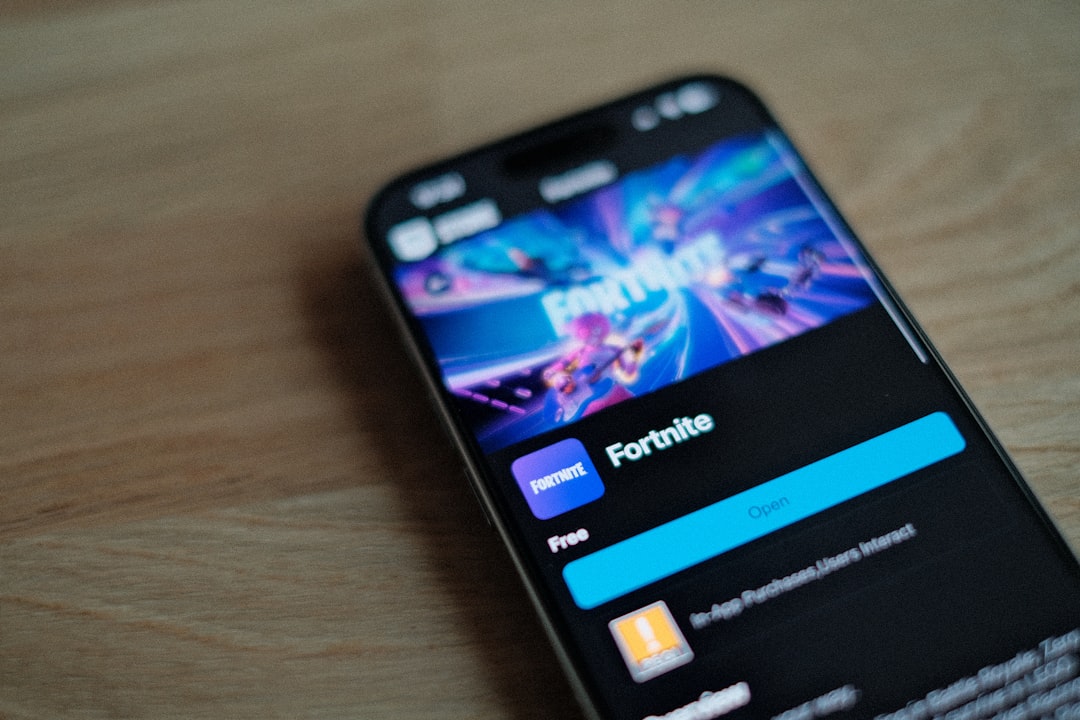
    WhatsApp Plus is a modified version of WhatsApp created by third-party developers. It is commonly known as a WhatsApp mod, which means it uses the basic structure of WhatsApp but adds features that are not available in the official app.

    Some users are attracted to WhatsApp Plus because it offers a more flexible experience. For example, you may be able to change themes, adjust the appearance of chat screens, hide certain activity indicators, or send media files with fewer restrictions. To someone who uses WhatsApp every day, these extra controls can sound useful.

    However, there is a major difference between WhatsApp and WhatsApp Plus: WhatsApp is official, while WhatsApp Plus is not. That difference affects security, privacy, updates, and long-term reliability.

    Why Do People Use WhatsApp Plus?

    The popularity of WhatsApp Plus comes from features that many users wish the official WhatsApp app had. While feature lists can vary depending on the version, common attractions include:

    • Custom themes: Users can change colors, chat bubbles, fonts, and layouts.
    • Advanced privacy settings: Some versions claim to hide online status, blue ticks, typing status, or recording indicators.
    • Larger media sharing: Users may be able to send bigger videos, more images, or higher-quality files.
    • More control over chats: Some versions include message scheduling, auto-replies, or custom contact settings.
    • Visual personalization: Icons, notification styles, and home screens can sometimes be modified.

    These features can make WhatsApp Plus feel more powerful than the official app. But extra features do not automatically mean better software. In fact, with unofficial apps, the added options can come at the cost of security and trust.

    Is WhatsApp Plus Official?

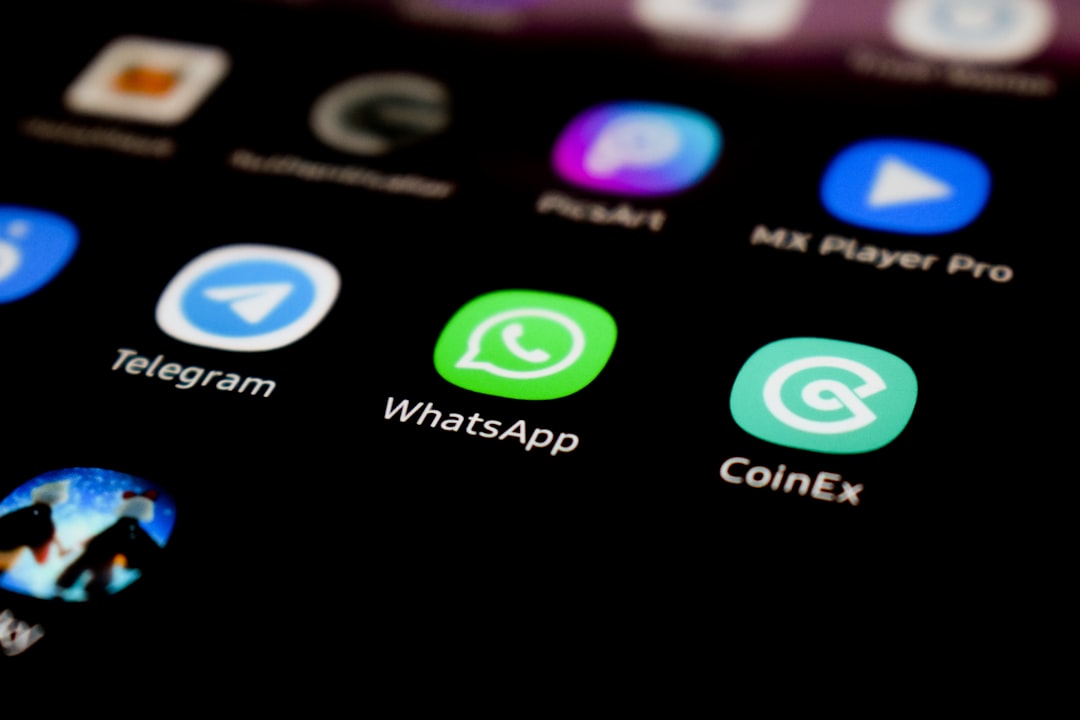
    No. WhatsApp Plus is not an official app from WhatsApp, Meta, or any verified developer connected to WhatsApp. It is not available on the Google Play Store or Apple App Store because it does not meet the same official distribution and security requirements.

    Instead, WhatsApp Plus is usually downloaded as an APK file from third-party websites. This is where the risk begins. When you install an APK from outside a trusted app store, you are relying on the website and unknown developers to provide a safe file. That file could be clean, but it could also contain hidden tracking tools, malicious code, or unwanted permissions.

    This does not mean every WhatsApp Plus download is automatically infected, but it does mean you have less certainty about what you are installing.

    The Main Safety Risks of WhatsApp Plus

    To understand whether WhatsApp Plus is safe, it helps to look at the biggest risks separately.

    1. Data Privacy Concerns

    Messaging apps handle highly personal information: phone numbers, contacts, photos, voice notes, documents, group chats, and private conversations. With the official WhatsApp app, messages are protected by end-to-end encryption. That means only you and the person you are chatting with should be able to read the messages.

    With WhatsApp Plus, the situation is less clear. Because it is modified by third parties, users cannot easily verify whether encryption is implemented properly or whether additional code has been added. Even if the app claims to use WhatsApp’s encryption system, you are still trusting an unofficial developer with access to your device and app activity.

    In simple terms: you may not know who can see what.

    2. Malware and Fake APKs

    One of the biggest dangers is not only WhatsApp Plus itself, but the websites offering it. Many sites publish APK files with similar names, and not all of them are trustworthy. A fake or altered APK can include malware that steals data, shows intrusive ads, monitors activity, or installs additional unwanted apps.

    Because WhatsApp Plus is not downloaded from official stores, it does not pass through the same automated security checks. App stores are not perfect, but they do provide an extra layer of protection that random download pages do not.

    3. Account Ban Risk

    WhatsApp’s official terms of service do not allow modified or unauthorized versions of the app. If WhatsApp detects that you are using WhatsApp Plus or another modded client, your account may be temporarily or permanently banned.

    Some users report only temporary warnings, while others have experienced longer restrictions. The risk can change depending on the version of the mod, WhatsApp’s detection systems, and how the app is used. But the important point is clear: using WhatsApp Plus can put your WhatsApp account at risk.

    4. No Guaranteed Security Updates

    Official apps receive regular security patches. When vulnerabilities are found, trusted developers can release updates through official channels. WhatsApp Plus updates depend on whoever maintains the modified version you installed.

    If the developer stops updating it, delays a patch, or distributes updates through unsafe websites, your app may become more vulnerable over time. In security, outdated software is one of the easiest targets.

    5. Excessive App Permissions

    Messaging apps naturally need certain permissions, such as access to contacts, camera, microphone, and storage. However, unofficial apps may request permissions that are broader than necessary. If you grant them, the app could potentially access files, media, or device information beyond what you expect.

    Most users tap “Allow” quickly during installation. With unofficial apps, that habit can be dangerous.

    Is WhatsApp Plus Legal?

    The legal situation depends on your country and how the app is distributed, but from a user perspective, the more immediate issue is that WhatsApp Plus likely violates WhatsApp’s terms of service. Even if using it is not treated as a criminal matter, it can still result in consequences such as account restrictions.

    Also, because WhatsApp Plus is built using WhatsApp’s platform in an unauthorized way, it exists in a gray area. That gray area is one reason you will not find it in official app stores.

    Can WhatsApp Plus Read Your Messages?

    This is one of the most common questions, and the honest answer is: it is difficult to know for sure. Since WhatsApp Plus is not open to the same level of public trust, official review, or app store verification, users cannot easily confirm what happens behind the scenes.

    Even if your messages are still sent through WhatsApp’s encrypted system, the modified app may have access to content before it is encrypted or after it is decrypted on your device. That is why security experts usually recommend avoiding unofficial messaging clients for sensitive conversations.

    If you use WhatsApp to discuss private matters, business information, financial details, personal documents, or family issues, installing a modified app is a risk that may not be worth taking.

    WhatsApp Plus vs Official WhatsApp

    Here is a simple comparison:

    • Security: Official WhatsApp is safer because it comes from a verified source and receives regular updates.
    • Privacy: Official WhatsApp provides clearer privacy protections and policies.
    • Customization: WhatsApp Plus offers more visual and functional customization.
    • Reliability: Official WhatsApp is more stable and less likely to break after updates.
    • Account safety: Official WhatsApp does not carry the same ban risk.
    • Installation: Official WhatsApp is available from trusted app stores, while WhatsApp Plus requires third-party downloads.

    In short, WhatsApp Plus may win on customization, but official WhatsApp wins on trust, safety, and long-term dependability.

    What Happens If You Already Installed WhatsApp Plus?

    If you already use WhatsApp Plus and are concerned about safety, consider taking these steps:

    1. Back up important chats if possible, but be careful with where backups are stored.
    2. Uninstall WhatsApp Plus from your device.
    3. Download the official WhatsApp app only from the Google Play Store, Apple App Store, or WhatsApp’s official website.
    4. Enable two-step verification in WhatsApp settings to protect your account.
    5. Review device permissions and remove access from suspicious apps.
    6. Run a mobile security scan if you downloaded the APK from an unknown website.
    7. Change important passwords if you suspect your device may have been compromised.

    Are There Safer Alternatives?

    If you want more privacy or customization, you have safer options than installing WhatsApp Plus. Start by exploring the settings inside the official WhatsApp app. You can hide your last seen status, control who sees your profile photo, manage read receipts, lock chats, enable disappearing messages, and use two-step verification.

    You can also consider other secure messaging apps that are officially available through trusted stores. Apps such as Signal and Telegram offer different privacy and customization features, though each has its own strengths and limitations. The key is to choose apps from verified developers and official sources.

    How to Stay Safe When Installing Any Messaging App

    Whether you use WhatsApp, WhatsApp Plus, or another app, these safety habits are worth following:

    • Download apps only from official stores whenever possible.
    • Avoid APK files from unknown websites, especially if they promise premium features for free.
    • Check app permissions before granting access.
    • Keep your apps updated to receive security fixes.
    • Use two-factor or two-step verification for important accounts.
    • Be cautious with links and attachments, even from known contacts.
    • Do not share verification codes with anyone.

    Final Verdict: Is WhatsApp Plus Safe?

    WhatsApp Plus is attractive because it gives users extra features that the official app does not offer. But those benefits come with serious trade-offs. Since it is unofficial, distributed through third-party APK websites, and not approved by WhatsApp, it carries real risks related to malware, privacy, account bans, and unreliable updates.

    If you only care about themes and extra controls, WhatsApp Plus may seem convenient. But if you care about your private messages, contacts, photos, and account security, the safer decision is to avoid it. For most users, WhatsApp Plus is not worth the risk.

    The best approach is simple: use the official WhatsApp app, keep it updated, review your privacy settings, and protect your account with two-step verification. Custom features are nice, but when it comes to messaging, trust and security matter more than appearance.

  • Which Video Splitter Apps Work Best for WhatsApp in 2026?

    Which Video Splitter Apps Work Best for WhatsApp in 2026?

    Sending longer videos on WhatsApp is still a little awkward in 2026, especially when you want a smooth Status story, a neat chat upload, or a clip that does not get crushed by compression. The good news is that video splitter apps have become faster, smarter, and far easier to use. The best ones now do more than chop a video into parts: they preserve quality, auto-detect WhatsApp-friendly lengths, export in the right aspect ratio, and help your clips feel intentional rather than randomly sliced.

    TLDR: For most people, CapCut, InShot, and VN Video Editor are the best all-round video splitter apps for WhatsApp in 2026 because they combine splitting, editing, captions, and quality controls. If you only want quick Status splitting, simple apps such as Video Splitter for WhatsApp Status, Story Cutter, or CutStory are faster. Choose a splitter that supports 30 or 60 second segments, exports in MP4, keeps audio synced, and does not add annoying watermarks.

    Why WhatsApp Still Needs Video Splitter Apps

    WhatsApp has improved video sharing over the years, but its limits still make splitters useful. Depending on your region, app version, and whether you are posting to Status or sending in a chat, WhatsApp may limit video duration, compress media, or make longer clips harder to preview cleanly. For Status, many users still plan around short segments, commonly 30 to 60 seconds. For chats, the issue is less about duration and more about file size, upload speed, and quality loss.

    A good video splitter solves these problems by dividing one long video into multiple WhatsApp-ready clips. Better apps also trim silence, add transitions, adjust resolution, and keep the final clips organized in order. That matters if you are sharing a travel vlog, a product demo, a wedding highlight, a lecture excerpt, or a funny family moment that deserves more than one tiny segment.

    Image not found in postmeta

    What Makes a Great WhatsApp Video Splitter in 2026?

    Before naming the best apps, it helps to know what separates a useful splitter from a frustrating one. In 2026, the best WhatsApp video splitter apps usually offer:

    • Automatic WhatsApp segment lengths: Look for presets such as 30 seconds, 45 seconds, or 60 seconds.
    • High-quality MP4 export: MP4 with H.264 or H.265 support is still the safest choice for WhatsApp compatibility.
    • No audio drift: Poor splitters sometimes create clips where the sound slowly goes out of sync.
    • Batch exporting: The app should create all segments at once instead of making you save them one by one.
    • Watermark control: Free apps are fine, but a large watermark can make personal or business videos look unprofessional.
    • Vertical video support: Since WhatsApp Status is usually viewed vertically, 9:16 editing is essential.
    • Light editing tools: Captions, cropping, music, stickers, and simple color correction can make split videos more engaging.

    1. CapCut: Best Overall for Creative WhatsApp Videos

    CapCut remains one of the strongest choices in 2026 for users who want more than a basic split. It is especially good for WhatsApp Status videos, reels-style edits, birthday clips, event highlights, and short promotional content. You can import a long video, cut it into precise sections, add captions, apply filters, and export in a vertical format that looks great on phones.

    The biggest advantage of CapCut is its balance of power and simplicity. It includes timeline editing, auto captions, music syncing, templates, background removal, and quality export controls. If you want your WhatsApp video to look polished rather than merely divided, CapCut is the safest recommendation.

    However, it may feel like too much if your only goal is to split a two-minute video into four Status clips. Some features also depend on internet access or account settings. Still, for creators, small businesses, students, and social users, CapCut is one of the best WhatsApp video splitter options in 2026.

    2. InShot: Best for Easy Editing and Clean Exports

    InShot is ideal for people who want a friendly editor with reliable splitting tools. It has a cleaner learning curve than many full editors, while still offering trimming, cutting, canvas resizing, text, stickers, music, and speed controls. If you frequently make WhatsApp Status posts, InShot is a practical everyday tool.

    One thing InShot does especially well is format control. You can quickly choose a 9:16 vertical canvas for Status, crop the video, blur the background, and keep the main subject centered. This is useful when your original footage was recorded horizontally but you want it to look natural in WhatsApp.

    The free version may include ads or watermark limitations, depending on your device and plan, but the paid version is generally affordable for regular users. InShot is not always the fastest for splitting very long files, but for social videos under ten minutes, it is smooth, dependable, and easy to recommend.

    3. VN Video Editor: Best Free Advanced Option

    VN Video Editor is a favorite among users who want advanced control without immediately paying for a subscription. It feels closer to desktop editing software than a basic mobile splitter. You can make accurate cuts, arrange multiple clips, adjust audio, add subtitles, control export settings, and create a more cinematic WhatsApp sequence.

    VN is particularly good if you want to split a longer video into story-like chapters. For example, instead of cutting every 30 seconds randomly, you can split at natural pauses: intro, main point, reaction, ending. That makes your WhatsApp Status easier to follow and more enjoyable to watch.

    The tradeoff is that VN has more buttons and options than a casual splitter. Beginners may need a few minutes to understand the timeline. Once learned, though, it becomes one of the most flexible tools for WhatsApp video preparation.

    Image not found in postmeta

    4. Video Splitter for WhatsApp Status: Best for Speed on Android

    If you use Android and only care about fast splitting, apps with names like Video Splitter for WhatsApp Status are often the quickest solution. These tools usually do one job: choose a video, select a segment length, and export multiple parts for posting to Status.

    The main benefit is speed. You do not need to learn editing timelines or adjust advanced settings. Many of these apps offer a WhatsApp preset and automatically save clips in order, such as Part 1, Part 2, Part 3, and so on.

    Be selective, though. The Play Store has many similar splitter apps, and quality varies. Check recent reviews, update dates, ad behavior, and whether the app preserves video quality. Avoid apps that demand unnecessary permissions or fill every step with pop-ups. The best simple splitters are lightweight, offline-friendly, and transparent about export quality.

    5. Story Cutter: Best Simple Status Splitter

    Story Cutter is another strong option for users who want a direct tool for WhatsApp Status, Instagram Stories, and similar short-form platforms. It is designed around the idea that social videos need to be separated into bite-sized clips quickly.

    The appeal of Story Cutter is convenience. You can select your desired duration and let the app generate the segments. It is not meant to replace a full video editor, but that is part of its charm. If you already edited your video elsewhere and simply need it split for WhatsApp, Story Cutter can save time.

    For best results, use it with videos that are already in the correct orientation and resolution. If your footage needs cropping, subtitles, noise reduction, or music editing, use CapCut, InShot, or VN first, then split the final export.

    6. CutStory: Best for iPhone Users Who Want Quick Splits

    For iPhone users, CutStory has long been a popular choice for cutting longer videos into shorter clips for messaging and story platforms. In 2026, it remains useful because it is quick, simple, and comfortable for people who do not want a full editing suite.

    CutStory works well when you want to prepare WhatsApp Status videos from iPhone camera footage. It can split clips into preset lengths and export them to your camera roll, where they are easy to upload in order. This is especially handy for events, speeches, tutorials, or behind-the-scenes clips.

    As with most simple tools, its weakness is limited creative editing. You may still want another app for captions, color adjustments, or branding. But for straightforward WhatsApp splitting on iOS, CutStory deserves a place on the shortlist.

    7. WhatsApp’s Built-In Trim Tool: Best for Very Short Edits

    Do not overlook WhatsApp itself. The built-in trim tool is useful when you only need to shorten the beginning or end of a clip before sending. It is not a true automatic splitter, but for quick chat videos, it can be enough.

    The built-in tool is best for small edits: removing a shaky start, cutting an awkward pause, or reducing file size before sending. It is not the right choice if you need to divide a five-minute video into multiple Status posts. Still, it is fast, private, and does not require another download.

    Best App by Use Case

    Different users need different tools. Here is the simplest way to choose:

    • Best overall: CapCut, because it combines splitting with creative editing.
    • Best for beginners: InShot, because it is easy to learn and produces clean results.
    • Best free advanced editor: VN Video Editor, especially for precise timeline control.
    • Best quick Android splitter: Video Splitter for WhatsApp Status, if you choose a well-reviewed version.
    • Best simple story splitter: Story Cutter, for fast preset-based exports.
    • Best iPhone quick splitter: CutStory, for saving Status-ready clips to the camera roll.
    • Best no-download option: WhatsApp’s built-in trim tool, for tiny edits only.
    Image not found in postmeta

    Tips for Better WhatsApp Split Videos

    Even the best splitter cannot fix every problem automatically. To make your WhatsApp clips look better, keep these practical tips in mind:

    1. Record vertically for Status. A 9:16 video fills the screen and feels more natural.
    2. Split at meaningful moments. Avoid cutting someone mid-sentence if you can.
    3. Add captions. Many people watch Status updates without sound.
    4. Keep file size reasonable. Very high bitrates may upload slowly or get compressed heavily.
    5. Number your clips mentally. Upload in the correct order so the story makes sense.
    6. Preview before posting. Check audio sync, text placement, and transitions.

    Final Verdict

    The best video splitter app for WhatsApp in 2026 depends on how much editing you want to do. If you want a polished, modern video with captions, music, effects, and clean segments, CapCut is the best overall pick. If you want something easier and still stylish, InShot is the most comfortable choice. If you want deeper control without making things too expensive, VN Video Editor is excellent.

    For users who only need fast Status splitting, dedicated tools like Video Splitter for WhatsApp Status, Story Cutter, and CutStory are often more efficient. The smartest approach is to keep two tools: one full editor for making the video look good, and one lightweight splitter for quick WhatsApp-ready exports. That way, your videos are not just divided into parts; they are shared in a way that feels smooth, clear, and worth watching.

  • How to Fix Discord Error 3002: A Quick Guide

    How to Fix Discord Error 3002: A Quick Guide

    Discord is the digital couch where friends hang out, gamers plan raids, and communities share memes at lightning speed. So when Discord Error 3002 pops up, it can feel like someone stole the Wi Fi gremlin and gave it a tiny sword. Do not panic. This guide keeps things simple, fast, and mildly fun.

    TLDR: Discord Error 3002 is usually caused by a connection issue, a broken app cache, outdated Discord files, or a firewall blocking the app. Start by restarting Discord and checking your internet. Then clear the cache, update the app, and check security settings. If nothing works, reinstall Discord like a fresh sandwich.

    What Is Discord Error 3002?

    Discord Error 3002 is one of those annoying little error codes that does not always explain itself. It may appear when Discord cannot connect properly, load a feature, sync data, or complete an action. In plain words, Discord is trying to do something, but something gets in the way.

    That “something” can be your internet connection. It can be Discord’s servers. It can be a messy app cache. It can also be your firewall acting like an overprotective dragon.

    The good news is simple. Most of the time, you can fix it yourself. No magic wand needed. Just a few quick steps.

    Image not found in postmeta

    Common Causes of Discord Error 3002

    Before we fix the beast, it helps to know what woke it up. Error 3002 can happen for several reasons.

    • Weak internet connection: Discord needs a stable connection to work well.
    • Outdated Discord app: Old files can cause strange bugs.
    • Corrupted cache: Cache files can get messy over time.
    • Firewall or antivirus blocks: Security apps may block Discord by mistake.
    • Discord server issues: Sometimes the problem is not you. It is Discord.
    • VPN or proxy problems: These can confuse Discord’s connection.
    • Temporary app glitch: Apps trip over their own shoelaces sometimes.

    Now let us fix it. One step at a time. Nice and easy.

    1. Restart Discord First

    Yes, this sounds too simple. But it works more often than people like to admit. Discord may have a temporary glitch. A restart gives it a tiny nap.

    Here is what to do:

    1. Close Discord completely.
    2. Make sure it is not still running in the background.
    3. On Windows, right click the Discord icon in the system tray.
    4. Click Quit Discord.
    5. Open Discord again.

    If you are on Mac, quit the app from the menu bar or use Command + Q. Then open it again.

    If Error 3002 disappears, great. You win round one. If not, keep going.

    2. Check Discord Server Status

    Sometimes the issue is not your computer. Discord may be having server problems. This is like showing up to a party and finding out the building has no power.

    Visit the official Discord status page. Look for outages or service issues. If there is a problem listed, you may only need to wait.

    Yes, waiting is boring. But it is also free.

    While you wait, avoid changing too many settings. If Discord is down, your settings are probably fine.

    3. Test Your Internet Connection

    Discord needs a steady internet connection. It does not need superhero speed. But it does need stability.

    Try these quick checks:

    • Open a website in your browser.
    • Play a short video.
    • Run a speed test.
    • Check if other apps are loading slowly.

    If everything feels slow, restart your router. Unplug it. Wait about 30 seconds. Plug it back in. Give it a minute to wake up and remember its life purpose.

    If you are using Wi Fi, move closer to the router. Walls, floors, and microwaves can bully your signal. If possible, try a wired connection. Ethernet is not glamorous, but it is steady.

    Image not found in postmeta

    4. Update Discord

    An outdated Discord app can cause errors. Updates fix bugs, improve performance, and sometimes stop error codes from tap dancing on your screen.

    Discord usually updates itself. But you can help it along.

    On desktop:

    1. Open Discord.
    2. Press Ctrl + R on Windows.
    3. Press Command + R on Mac.
    4. Wait for Discord to reload.

    This forces Discord to refresh. If an update is ready, it may install it.

    You can also close Discord fully and open it again. Discord checks for updates during launch.

    5. Clear Discord Cache

    Cache is like Discord’s junk drawer. It stores temporary files to help things load faster. That is useful. But sometimes the drawer gets too full. Or weird. Or haunted.

    Clearing the cache can fix Error 3002 and many other strange Discord problems.

    Clear Discord Cache on Windows

    1. Close Discord completely.
    2. Press Windows + R.
    3. Type %appdata%/discord.
    4. Press Enter.
    5. Find these folders: Cache, Code Cache, and GPUCache.
    6. Delete those folders.
    7. Open Discord again.

    Clear Discord Cache on Mac

    1. Quit Discord.
    2. Open Finder.
    3. Click Go in the top menu.
    4. Click Go to Folder.
    5. Type ~/Library/Application Support/discord.
    6. Delete Cache, Code Cache, and GPUCache.
    7. Restart Discord.

    Do not worry. Discord will rebuild these files. It is like cleaning crumbs from a keyboard. The keyboard still works. It just feels less cursed.

    6. Disable VPN or Proxy Temporarily

    VPNs are useful. They protect privacy and help with location issues. But sometimes Discord does not enjoy the ride. A VPN can cause routing problems. A proxy can do the same.

    Try turning your VPN off for a moment. Then open Discord again. If Error 3002 is gone, your VPN may be the troublemaker.

    You do not have to stop using a VPN forever. Try a different VPN server. Choose one closer to your real location. You can also check if your VPN has a setting for split tunneling. That lets Discord skip the VPN while other apps still use it.

    7. Check Your Firewall and Antivirus

    Your firewall is there to protect you. That is good. But sometimes it gets dramatic. It may block Discord even when Discord is just trying to chat.

    Check if Discord is allowed through your firewall.

    On Windows

    1. Open the Start menu.
    2. Search for Windows Defender Firewall.
    3. Click Allow an app through firewall.
    4. Find Discord.
    5. Make sure both Private and Public boxes are checked.
    6. Save changes.

    If you use a third party antivirus, open it and look for blocked apps. Add Discord to the allowed list if needed.

    Important: Do not turn off your security forever. If you test by disabling it, turn it back on after checking. Safety first. Memes second.

    8. Run Discord as Administrator

    Sometimes Discord needs extra permission to work correctly. Running it as administrator can help, especially on Windows.

    Here is how:

    1. Close Discord.
    2. Right click the Discord shortcut.
    3. Click Run as administrator.
    4. Approve the prompt.

    If this works, you can set Discord to always run this way.

    1. Right click the Discord shortcut.
    2. Click Properties.
    3. Open the Compatibility tab.
    4. Check Run this program as an administrator.
    5. Click Apply.

    9. Flush DNS

    DNS helps your device find websites and services. Think of it like the internet’s phone book. Sometimes that phone book gets old or confused. Flushing DNS can give it a fresh start.

    On Windows

    1. Open the Start menu.
    2. Type cmd.
    3. Right click Command Prompt.
    4. Select Run as administrator.
    5. Type ipconfig /flushdns.
    6. Press Enter.

    You should see a message that the DNS resolver cache was cleared.

    On Mac

    Open Terminal and enter the correct DNS flush command for your macOS version. Apple changes these commands sometimes. If you are not sure, check Apple’s support information for your version.

    After flushing DNS, restart Discord and test again.

    10. Switch DNS Servers

    If flushing DNS does not help, try a different DNS server. Some popular options are Google DNS and Cloudflare DNS.

    • Google DNS: 8.8.8.8 and 8.8.4.4
    • Cloudflare DNS: 1.1.1.1 and 1.0.0.1

    This can make connection issues better. It can also help if your internet provider’s DNS is having a bad day.

    If you are not comfortable changing DNS settings, ask someone tech friendly. Preferably someone who does not say “just reinstall Windows” every five minutes.

    11. Try Discord in a Browser

    If the desktop app keeps showing Error 3002, try Discord in your browser. Go to the Discord website and log in.

    If the browser version works, your account and internet are probably fine. The desktop app may be the problem. That means clearing cache, updating, or reinstalling should help.

    If the browser version also fails, the issue may be your network, DNS, VPN, firewall, or Discord itself.

    This test is quick. It gives you a clue. Clues are good. They make you feel like a detective with better headphones.

    12. Reinstall Discord

    If nothing else works, reinstall Discord. This removes broken files and gives the app a fresh start.

    On Windows

    1. Close Discord completely.
    2. Open Settings.
    3. Go to Apps.
    4. Find Discord.
    5. Click Uninstall.
    6. Restart your computer.
    7. Download Discord again from the official site.
    8. Install it.

    On Mac

    1. Quit Discord.
    2. Open the Applications folder.
    3. Drag Discord to the Trash.
    4. Clear leftover Discord support files if needed.
    5. Restart your Mac.
    6. Install Discord again.
    Image not found in postmeta

    13. Check Your Date and Time Settings

    This sounds odd, but wrong date and time settings can break secure connections. Discord may struggle if your system clock is far off.

    Set your device to update time automatically.

    • On Windows, go to Settings, then Time and language.
    • On Mac, go to System Settings, then Date and Time.

    Turn on automatic time and time zone. Then restart Discord.

    14. Contact Discord Support

    If Error 3002 still refuses to leave, it may be time to call in backup. Contact Discord Support. Tell them what happened. Include the steps you already tried.

    Helpful details include:

    • Your device type.
    • Your operating system.
    • Whether you use a VPN.
    • Whether Discord works in a browser.
    • A screenshot of the error.
    • When the error started.

    The more details you give, the easier it is for support to help. Do not just write, “It broke.” That gives them very little to work with. Be kind to support people. They fight error goblins all day.

    Quick Fix Checklist

    Want the speedy version? Try this list in order.

    1. Restart Discord.
    2. Check Discord server status.
    3. Restart your router.
    4. Update Discord.
    5. Clear Discord cache.
    6. Turn off VPN or proxy briefly.
    7. Allow Discord through firewall.
    8. Flush DNS.
    9. Try Discord in a browser.
    10. Reinstall Discord.

    Final Thoughts

    Discord Error 3002 can be annoying, but it is usually not a disaster. Most fixes are simple. Start with the easy stuff. Restart the app. Check your connection. Clear the cache. Then move to deeper fixes like DNS, firewall settings, or reinstalling.

    The key is to test one thing at a time. Do not change 20 settings at once. That turns troubleshooting into soup. Weird, stressful soup.

    With a little patience, Discord should be back to normal soon. Then you can return to voice chats, game nights, study groups, server chaos, and sending that one reaction GIF everyone secretly loves.

  • What Is Gemini Air and How to Use It?

    What Is Gemini Air and How to Use It?

    Some tech names sound like they come from a sci fi movie. Gemini Air is one of them. It sounds fast, light, and a little magical. That is a pretty good way to think about it.

    TLDR: Gemini Air is a simple way to use Gemini style AI for quick help with writing, planning, learning, and daily tasks. Think of it as a smart assistant that can answer questions, create text, explain ideas, and help you get unstuck. You use it by typing a clear request, adding useful details, and checking the results before you rely on them.

    So, What Is Gemini Air?

    Gemini Air can be understood as a lightweight, easy to use version or experience of Gemini powered AI. In simple words, it is an AI helper. You ask it for help. It replies in plain language.

    It can help with many things. It can write emails. It can explain hard topics. It can create lists. It can brainstorm ideas. It can help you study. It can also turn messy notes into neat summaries.

    The word Air suggests something light and quick. So, when people talk about Gemini Air, they often mean a fast and simple AI experience. No heavy setup. No scary buttons. Just ask and go.

    Still, names can change. Apps and services update all the time. So always check the exact product details in the app or service you are using. But the main idea stays the same. It is about using AI in a simple, everyday way.

    Image not found in postmeta

    Think of It Like a Digital Sidekick

    Imagine a very patient friend. This friend reads fast. Writes fast. Explains things without rolling their eyes. That is the vibe.

    Gemini Air is not a human. It does not “know” things in the same way people do. It predicts helpful answers based on patterns in language and data. That sounds fancy. But you do not need to worry about the machinery.

    You only need to know this:

    • You type a request.
    • It responds with an answer.
    • You can ask follow up questions.
    • You can edit, refine, and improve the result.

    That is the loop. Ask. Read. Adjust. Repeat.

    What Can You Use Gemini Air For?

    You can use it for work, school, home, hobbies, and random “why is the sky blue?” moments.

    1. Writing Help

    Gemini Air can help you write better and faster. It can draft emails, captions, blog ideas, reports, bios, and product descriptions.

    For example, you can ask:

    • Write a friendly email asking for a meeting.
    • Make this paragraph shorter and clearer.
    • Give me five fun titles for a travel article.

    It is great when your brain says, “No words today.”

    2. Learning and Explaining

    Gemini Air can explain difficult ideas in simple ways. You can ask it to act like a teacher. You can ask for examples. You can ask for a quiz.

    Try prompts like:

    • Explain photosynthesis like I am 10.
    • Teach me the basics of investing.
    • Give me a simple summary of World War One.

    If the first answer is too hard, say so. Ask it to make the answer easier. It will not be offended. It has no ego. Lucky us.

    3. Planning Your Day

    Need a plan? Gemini Air can help. It can organize tasks and build schedules.

    You can say:

    • I have six errands and three hours. Make a plan.
    • Create a simple morning routine for me.
    • Plan a weekend trip with a small budget.

    It can turn chaos into a checklist. That feels like magic. Very tidy magic.

    Image not found in postmeta

    4. Brainstorming Ideas

    Gemini Air is useful when you need ideas. It can help name a project. It can suggest party themes. It can create content ideas. It can even help you plan a birthday surprise.

    Ask for many options. Then pick the best ones. AI is great at giving you a pile of clay. You still get to shape it.

    5. Summaries

    Long text can be tiring. Gemini Air can help make it shorter. Paste in text and ask for a summary.

    You can request:

    • Summarize this in three bullet points.
    • Pull out the key action items.
    • Make this easier to read.

    This is handy for meeting notes, articles, research, and long messages from that one person who writes novels in chat.

    How to Use Gemini Air

    Using Gemini Air is usually simple. Open the tool. Find the chat box. Type your request. Press enter. Then read the answer.

    But there is a trick. Better input gives better output. In AI land, your request is called a prompt. A prompt is just what you ask the AI to do.

    Step 1: Be Clear

    Do not just type, Help me write. That is too vague.

    Try this instead:

    Write a friendly 150 word email to my manager asking if I can work from home on Friday. Keep it polite and casual.

    See the difference? You gave the task, tone, length, audience, and goal. That helps a lot.

    Step 2: Add Details

    Gemini Air is not a mind reader. Add context.

    For example:

    • Who is the message for?
    • What tone do you want?
    • How long should it be?
    • What should it include?
    • What should it avoid?

    Details are like ingredients. More useful ingredients make a better sandwich.

    Step 3: Ask for a Format

    If you want a list, say so. If you want a table, ask for one. If you want simple language, say that too.

    Examples:

    • Answer in bullet points.
    • Make a two column table.
    • Use short sentences.
    • Give me a step by step guide.

    Step 4: Refine the Answer

    The first answer may not be perfect. That is normal. Treat it like a draft.

    You can say:

    • Make it warmer.
    • Make it shorter.
    • Add examples.
    • Remove the jokes.
    • Explain the last part again.

    This is where Gemini Air gets more useful. You steer it. It follows.

    Image not found in postmeta

    Good Prompt Examples

    Here are some easy prompts you can copy and change.

    • For writing: Write a short, friendly welcome message for new customers. Keep it under 100 words.
    • For studying: Explain gravity in simple terms. Then give me five quiz questions.
    • For planning: Create a simple meal plan for three days. Use cheap ingredients.
    • For work: Summarize these meeting notes. List decisions, tasks, and deadlines.
    • For creativity: Give me ten funny names for a podcast about pets.

    What Gemini Air Is Good At

    Gemini Air is great for speed. It helps you start. It helps when you feel stuck. It can turn a blank page into something useful.

    It is also good at changing tone. You can make text sound formal, friendly, playful, or simple. This is helpful when you know what you mean, but not how to say it.

    It can also compare ideas. Ask for pros and cons. Ask for risks. Ask for a simpler option. It can help you think through choices.

    What Gemini Air Is Not Good At

    Gemini Air is helpful. But it is not perfect.

    It can make mistakes. It may sound confident even when wrong. This is why you should check important facts.

    Be extra careful with:

    • Medical advice
    • Legal questions
    • Financial decisions
    • Safety instructions
    • Breaking news
    • Private or sensitive information

    Use it as a helper, not a final authority. Think of it like a smart intern. Very fast. Very useful. Still needs supervision.

    Privacy Tips

    Do not paste secrets into any AI tool unless you understand how the service handles data. Avoid adding passwords, private documents, bank details, or personal ID numbers.

    If you are using it for work, follow your company rules. Some workplaces have strict policies about AI tools. Better safe than awkward meeting with IT.

    Fun Ways to Try Gemini Air

    Want to test it without pressure? Start with fun tasks.

    • Ask it to plan a fake pirate vacation.
    • Ask for a bedtime story about a brave toaster.
    • Ask it to explain taxes using pizza.
    • Ask for a workout plan for someone who hates workouts.
    • Ask it to turn your grocery list into a tiny poem.

    Playing with AI is a great way to learn. You discover what works. You also discover what goes hilariously wrong.

    Best Tips for Better Results

    Here is the simple cheat sheet:

    • Be specific. Clear requests get better answers.
    • Give context. Tell it what you are trying to do.
    • Set the tone. Say if you want formal, casual, funny, or simple.
    • Ask for structure. Lists and steps are easier to use.
    • Review the answer. Do not trust everything blindly.
    • Keep refining. The second answer is often better than the first.

    Final Thoughts

    Gemini Air is best seen as a fast, light, and friendly AI assistant. It can help you write, plan, learn, summarize, and brainstorm. It is like having a tiny idea factory in your browser or app.

    The secret is simple. Ask clear questions. Give useful details. Check the results. Then ask it to improve the answer.

    Use it well, and it can save time. It can make boring tasks easier. It can even make learning feel playful. And that is the real charm of Gemini Air. It turns “I have no idea where to start” into “Hey, this is actually doable.”

  • Why Do You Need a Video Splitter App for WhatsApp Videos?

    Why Do You Need a Video Splitter App for WhatsApp Videos?

    WhatsApp has become one of the most widely used channels for sharing personal updates, business messages, product demonstrations, event clips, tutorials, and community announcements. However, anyone who regularly shares video on WhatsApp knows one recurring problem: videos are often too long, too large, or poorly suited for the way WhatsApp displays and delivers content. A video splitter app for WhatsApp videos helps solve this problem by dividing longer videos into smaller, shareable parts without requiring advanced editing skills.

    TLDR: A video splitter app helps you cut long videos into shorter clips that are easier to send, upload, and watch on WhatsApp. It is especially useful for WhatsApp Status, business communication, tutorials, event highlights, and large video files. Instead of manually trimming clips one by one, a splitter app can save time, preserve continuity, and make your videos look more professional. For anyone who uses WhatsApp seriously, it is a practical tool rather than a luxury.

    WhatsApp Is Convenient, but It Has Video Limitations

    WhatsApp is designed for fast communication, not full-scale video publishing. That is why it places practical limits on how videos can be shared. For example, WhatsApp Status is commonly used for short updates, and longer videos may need to be split into multiple segments before they can be posted properly. Even when sending videos directly in chats or groups, file size, upload speed, compression, and viewing experience can become issues.

    This is where a dedicated video splitter app becomes useful. Instead of struggling with repeated manual trimming, re-exporting, or sending incomplete clips, the app helps divide a video into clean, consistent sections. The result is easier to upload, easier to view, and easier to understand.

    Image not found in postmeta

    What Is a Video Splitter App?

    A video splitter app is a tool that cuts a video into smaller parts. Unlike a basic trim function, a good splitter is designed to divide the video into multiple segments automatically or with precise manual control. This is especially helpful when you need several clips of a fixed duration, such as short sections for WhatsApp Status or smaller parts for group sharing.

    Many video splitter apps allow users to choose how they want the video divided. For example, you may split by:

    • Duration: such as 15 seconds, 30 seconds, or 1 minute per clip.
    • File size: useful when you need to send videos within upload limits.
    • Custom timestamps: helpful when you want to cut at specific moments.
    • Equal parts: useful for dividing one long video into several balanced clips.

    This makes the process more efficient and less frustrating, particularly for users who share video frequently.

    Why Manual Cutting Is Not Always Enough

    Most smartphones already include some form of video trimming. However, trimming manually is often slow and inconsistent. If you have a five-minute video and need to create ten or more short clips, you may have to cut, save, reopen, cut again, and repeat the process many times. This increases the chance of mistakes, such as overlapping clips, missing seconds, or uneven transitions.

    A video splitter app reduces these problems by automating the repetitive work. It helps ensure that each clip follows a consistent length and sequence. This matters because viewers can lose interest if a story feels broken, confusing, or out of order.

    For casual sharing, this may seem minor. But for business owners, educators, influencers, community organizers, and professionals, consistency matters. A well-split video can make your message feel clearer and more reliable.

    Better WhatsApp Status Sharing

    One of the main reasons people use video splitter apps is to post longer content on WhatsApp Status. Status updates are intended to be short, but many real-life videos are longer than the allowed or ideal duration. A birthday celebration, product showcase, travel clip, speech, testimonial, or announcement may not fit neatly into one short segment.

    With a splitter app, you can divide one long video into a sequence of shorter clips that can be posted one after another. Viewers can then watch the full story in order, without sudden missing parts. This is far more professional than cutting randomly or uploading only a small portion of the video.

    For example, a one-minute product demonstration can be split into two or three clean Status clips, each showing a clear part of the message: the problem, the product, and the result.

    Improved Viewer Experience

    People on WhatsApp often watch videos quickly, sometimes while commuting, working, or multitasking. Long, unstructured videos may be ignored or skipped. Shorter clips are easier to consume and more likely to be watched until the end.

    A video splitter app helps you present content in a format that matches how people actually use WhatsApp. Instead of sending one large file that feels like a commitment, you can share shorter, more digestible sections. This is useful for:

    • Short tutorials and instructions
    • Customer testimonials
    • Event highlights
    • Classroom or coaching clips
    • Religious or community messages
    • Marketing and promotional videos

    When content is easier to watch, it is more likely to be understood, remembered, and shared.

    Image not found in postmeta

    Helps Reduce File Size and Upload Problems

    Large video files can be difficult to send on WhatsApp, especially when the internet connection is weak or unstable. Uploads may fail, take too long, or cause the app to compress the video heavily. Compression can reduce quality, making text, faces, or product details less clear.

    Splitting a video into smaller parts can make the upload process smoother. Each individual clip is easier to process and send. If one part fails, you do not have to resend the entire long video. This can save time and data, especially for users who rely on mobile networks.

    For professionals, this is not just a convenience. If you are sending a video proposal, a training explanation, or an important client update, reliability matters. A splitter app makes the delivery process more manageable.

    Useful for Business and Marketing Communication

    WhatsApp is now widely used by small businesses, service providers, consultants, real estate agents, online sellers, coaches, restaurants, and local brands. Video is one of the most effective ways to explain products and build trust, but only if it is presented clearly.

    A video splitter app can help businesses create structured WhatsApp content. Instead of overwhelming customers with a long video, a business can send a sequence of short clips, each focused on one point.

    For example:

    1. Clip one: Introduce the product or service.
    2. Clip two: Explain the main benefit.
    3. Clip three: Show proof, demonstration, or testimonial.
    4. Clip four: Add pricing, availability, or next steps.

    This approach feels more organized and respectful of the viewer’s time. It also allows customers to respond to specific parts of the message, making conversations more productive.

    Better Storytelling and Content Flow

    A video splitter app is not only about cutting video. It is also about preserving the flow of communication. Good content has structure: a beginning, middle, and end. When a video is split poorly, the meaning can become unclear. Important words may be cut off, transitions may feel abrupt, and viewers may not understand the sequence.

    Many splitter apps allow you to preview clips before saving them. This helps you make sure each segment starts and ends at the right moment. Some apps also support frame-level or second-level precision, which is important when cutting speeches, interviews, lessons, or demonstrations.

    The goal is not simply to make a video shorter. The goal is to make it more effective on WhatsApp.

    Saves Time for Frequent Users

    If you only share videos occasionally, manual trimming may be acceptable. But if you share content daily or weekly, the time spent cutting videos can add up quickly. Content creators, teachers, sellers, and community managers often need to prepare multiple clips at once. Doing this manually can become inefficient.

    A video splitter app can significantly reduce repetitive work. Some apps allow batch processing, automatic splitting, and direct sharing to WhatsApp. These features make the workflow faster and more consistent.

    This time saving is especially valuable when content must be shared quickly, such as after a live event, meeting, workshop, sale, or announcement.

    Maintains a More Professional Appearance

    Professionalism is not only about expensive equipment or advanced editing. It is also about clarity, consistency, and attention to detail. When your WhatsApp videos are properly split, they look more intentional. Viewers can tell that the content has been prepared carefully.

    This is important in business and public communication. If a video starts awkwardly, ends in the middle of a sentence, or skips important context, it can reduce trust. On the other hand, cleanly divided clips suggest that you respect your audience and care about the quality of your message.

    Image not found in postmeta

    Helpful for Education and Training

    Teachers, tutors, coaches, and trainers often use WhatsApp to communicate with students or participants. Long educational videos can be difficult to watch on a phone, especially in group chats where many messages compete for attention. Splitting lessons into smaller parts makes learning more manageable.

    Short clips can focus on one idea at a time. This allows students to pause, replay, and ask questions about a specific section. It also makes it easier for instructors to organize material by topic.

    For example, a 12-minute lesson could be divided into clips covering introduction, explanation, example, exercise, and summary. This format is often more effective than sending one long recording.

    Important Features to Look For

    Not all video splitter apps are equally useful. Before choosing one, it is worth checking whether it includes reliable features that match your needs.

    • Automatic splitting by time: essential for creating consistent WhatsApp Status clips.
    • Preview before export: helps avoid awkward cuts.
    • Quality control: allows you to balance clarity and file size.
    • Fast processing: useful when working with longer videos.
    • No unnecessary watermark: important for professional communication.
    • Easy sharing: saves time when sending clips directly to WhatsApp.
    • Privacy awareness: important if your videos contain personal, client, or business information.

    Privacy deserves special attention. If a video includes sensitive information, choose an app that processes videos locally on your device when possible, and review its permissions carefully.

    When Do You Really Need One?

    You may need a video splitter app if you often deal with videos that are longer than what WhatsApp handles comfortably. This includes long Status updates, business presentations, event videos, tutorials, interviews, testimonials, and recorded instructions.

    You may also benefit from one if you frequently experience failed uploads, excessive compression, or viewer complaints that videos are too long. In these cases, splitting the video is not merely a technical fix. It improves communication.

    Conclusion

    A video splitter app for WhatsApp videos is useful because it adapts your content to the way WhatsApp is actually used. It helps overcome length and file limitations, improves the viewing experience, saves time, and supports clearer communication. Whether you are sharing personal memories, promoting a business, teaching a lesson, or managing a community, well-split videos are easier to send and easier to watch.

    In a messaging environment where attention is limited and clarity matters, a video splitter app can make your videos more effective. It is a simple tool, but for serious WhatsApp users, it can make a significant difference in quality, reliability, and presentation.

  • How to Delete Yahoo Account Permanently

    How to Delete Yahoo Account Permanently

    Deleting a Yahoo account can feel like cleaning out an old closet. You open the door. You find old emails, dusty subscriptions, and maybe a few forgotten passwords. Then you decide it is time to wave goodbye. The good news is this process is not scary. You just need to do it in the right order.

    TLDR: To delete your Yahoo account permanently, back up anything important first. Then go to Yahoo’s account termination page, sign in, read the warning, and confirm the deletion. Your account will usually stay recoverable for a short waiting period before it is gone for good. Do not forget to cancel paid services and update any accounts that use your Yahoo email.

    Before You Delete Your Yahoo Account

    Slow down for one tiny second. Do not smash the delete button yet. Your Yahoo account may be connected to more things than you remember.

    Think of your Yahoo account like a little digital octopus. Its arms may be wrapped around email, contacts, photos, fantasy sports, shopping accounts, social media, bank alerts, newsletters, and old logins.

    So before you delete it, do a quick safety check.

    • Back up important emails. Save messages you want to keep.
    • Download contacts. You may need phone numbers or addresses later.
    • Cancel subscriptions. Paid Yahoo services should be handled first.
    • Change login emails. Update accounts that use your Yahoo address.
    • Tell important people. Give friends, family, and clients your new email.
    • Check recovery settings. Remove Yahoo from other accounts if it is used for password recovery.

    This step matters. Once your account is deleted, getting things back can be hard. Sometimes it is impossible. The delete button is not a toy. It is more like a tiny digital volcano.

    Image not found in postmeta

    What Happens When You Delete a Yahoo Account?

    When you delete your Yahoo account, you lose access to Yahoo services linked to it. This usually includes Yahoo Mail, Yahoo Contacts, Yahoo Calendar, Yahoo Fantasy, and other Yahoo features tied to the same login.

    Your emails will be deleted. Your contacts will be deleted. Your settings will be deleted. Your account data will be scheduled for removal.

    Yahoo may not erase everything the instant you click confirm. There is usually a waiting period. During this time, you may be able to recover the account by signing back in. After the waiting period ends, the account is permanently deleted.

    The waiting period can vary by country or region. For many users, it is about 30 days. In some places, it may be longer. Yahoo will show details during the deletion process.

    So yes, there is a small “oops” window. But do not rely on it. Treat the action as permanent.

    Step 1: Sign In to Your Yahoo Account

    First, go to Yahoo and sign in. Use the account you want to delete. Not your backup account. Not your cousin’s account. The exact one.

    You may need to enter a verification code. Yahoo may send it to your phone or recovery email. This is normal. Yahoo wants to make sure it is really you.

    If you forgot your password, use the account recovery option first. You cannot delete an account if you cannot access it.

    If your account has been inactive for a very long time, it may already be deactivated. Try signing in to check its status.

    Step 2: Visit the Yahoo Account Termination Page

    Once you are signed in, open Yahoo’s account termination page. You can find it by searching for Yahoo account termination page in your browser.

    You can also go directly to:

    https://login.yahoo.com/account/delete-user

    Make sure the page is from Yahoo. Check the address bar. Do not enter your password on a strange website. The internet has raccoons in trench coats. Be careful.

    When the page opens, Yahoo will show information about what deletion means. Read it. It may not be the most exciting reading in the world, but it is important.

    Step 3: Read the Warning Page

    Yahoo will explain what you are about to lose. This is the “are you really sure?” moment.

    You may see warnings about:

    • Loss of access to Yahoo Mail.
    • Deletion of emails and contacts.
    • Loss of Yahoo services connected to the account.
    • Possible loss of paid features.
    • The waiting period before permanent deletion.

    Read the details. If something looks important, stop. Go back and save what you need.

    This is like checking your pockets before washing jeans. You do not want to find out later that your digital wallet was in there.

    Image not found in postmeta

    Step 4: Confirm Your Identity

    Yahoo may ask you to sign in again. It may also ask for a verification code. This is another security step.

    Enter the code if needed. Follow the prompts. Keep going until you reach the final confirmation screen.

    If you do not receive a code, check your phone number and recovery email. Also check your spam folder if the code is sent by email.

    If you no longer have access to your recovery options, use Yahoo’s account recovery tools. You may need to prove ownership before moving forward.

    Step 5: Type Your Email Address

    Yahoo may ask you to type your email address to confirm. This is common. It helps prevent accidental deletion.

    Type the full Yahoo email address carefully. For example:

    yourname@yahoo.com

    Then click the confirmation button. The button text may say something like Yes, terminate this account or Continue delete my account.

    Once you confirm, your account is marked for deletion.

    Step 6: Do Not Sign Back In

    This part is easy, but also sneaky. If you sign back in during the waiting period, you may reactivate the account.

    So if you truly want the account gone, leave it alone. Do not check “just one last email.” Do not peek. Do not wiggle the doorknob.

    Let the waiting period pass. After that, Yahoo will complete the deletion according to its policies.

    How to Back Up Yahoo Emails Before Deleting

    If you have important emails, save them first. Future you will thank present you. Maybe with snacks.

    Here are simple ways to save Yahoo emails:

    • Forward important emails to your new email address.
    • Download attachments to your computer or cloud storage.
    • Use an email app like Outlook, Apple Mail, or Thunderbird to copy messages.
    • Print key emails as PDF files if you need records.

    Do not forget attachments. Old tax forms, receipts, photos, tickets, and contracts may be hiding in your inbox.

    Use the search bar to find words like invoice, receipt, password, ticket, bank, and tax. This can help you find important messages fast.

    How to Save Yahoo Contacts

    Your contacts are easy to forget. Then one day you need Aunt Linda’s email and it is gone. Disaster. Mild disaster, but still.

    Before deleting your Yahoo account, export your contacts if you use them.

    1. Open Yahoo Mail.
    2. Go to the Contacts section.
    3. Look for the option to export contacts.
    4. Save the file to your computer.
    5. Import it into your new email service if needed.

    The file may be saved as a CSV file. That is normal. It is just a simple spreadsheet style file for contacts.

    Update Accounts That Use Your Yahoo Email

    This is a big one. Many people forget it.

    If your Yahoo email is used for other websites, update those accounts before deleting Yahoo. Otherwise, password resets may go to an email address that no longer works.

    Check accounts like:

    • Banking apps.
    • Shopping sites.
    • Streaming services.
    • Social media accounts.
    • Work tools.
    • School accounts.
    • Government services.
    • Cloud storage accounts.
    • Phone provider accounts.

    Change the email address to your new one. Then confirm the change. Many sites send a confirmation message, so do this while your Yahoo inbox still works.

    Image not found in postmeta

    Cancel Paid Yahoo Services

    If you pay for any Yahoo service, cancel it before deleting your account. This may include premium mail features or other paid subscriptions.

    Go to your Yahoo account settings and check subscriptions. If you see an active paid service, cancel it. Save any confirmation emails or receipts.

    If you subscribed through a phone app store, check there too. Some subscriptions are managed through Apple or Google. Deleting your Yahoo account may not always cancel outside billing automatically.

    When money is involved, be extra careful. Money goblins love confusion.

    Can You Recover a Deleted Yahoo Account?

    Maybe. But only for a limited time.

    If you change your mind during the waiting period, try signing in again. Yahoo may let you reactivate the account. Follow the prompts if recovery is available.

    After the waiting period ends, the account is usually gone permanently. Emails, contacts, and data may not be recoverable.

    So if you are unsure, wait before starting deletion. You can always clean the inbox first. You can also stop using the account without deleting it right away.

    What If You Cannot Sign In?

    If you cannot sign in, you must recover the account first. Go to Yahoo’s sign in helper. Enter your Yahoo email address or recovery phone number. Follow the steps.

    If recovery works, sign in and continue with deletion.

    If recovery does not work, you may not be able to delete the account yourself. Yahoo needs to confirm ownership. This protects accounts from being deleted by random people. Annoying? Sometimes. Important? Yes.

    Should You Delete or Just Stop Using It?

    Deleting is not always the best choice. Sometimes it is smarter to keep the account but lock it down.

    Consider keeping it if:

    • You still receive important emails there.
    • It is used for account recovery.
    • You are not sure what is connected to it.
    • You may need old emails later.

    If you keep it, make it safer. Change the password. Turn on two step verification. Remove old recovery options. Delete emails you do not need.

    If you are sure you want a clean break, then permanent deletion is fine.

    Quick Checklist Before You Click Delete

    Here is your final “do not regret this later” checklist.

    • I saved important emails.
    • I downloaded important attachments.
    • I exported contacts.
    • I changed my login email on important websites.
    • I updated recovery emails on other accounts.
    • I canceled paid Yahoo services.
    • I told important contacts about my new email.
    • I understand the account may be gone forever.

    If you checked all of these, you are ready.

    Final Thoughts

    Deleting your Yahoo account permanently is simple. The main trick is preparation. Save your stuff. Update your other accounts. Cancel anything paid. Then use Yahoo’s account termination page and confirm the deletion.

    After that, do not sign back in unless you want to reactivate it. Let the waiting period pass. Then your old Yahoo account can ride into the digital sunset.

    And that is it. No drama. No wizard hat required. Just a few careful clicks and a clean goodbye.

  • TNT Streaming Guide: How to Watch Live 2026

    TNT Streaming Guide: How to Watch Live 2026

    Watching TNT live in 2026 is still most reliably done through a legitimate TV provider or a live TV streaming service that carries the channel in your area. Because TNT programming includes a mix of live sports, original shows, movies, syndicated series, and special events, the best option depends on what you want to watch, where you live, and whether you need access on a television, phone, tablet, or web browser.

    TLDR: To watch TNT live in 2026, choose a live TV streaming service or cable, satellite, or fiber TV provider that includes TNT in its channel lineup. After subscribing, you can usually watch through the provider’s app, a supported streaming device, or the TNT app and website with TV provider sign in. Before paying, confirm that TNT is included in your local package and that the service supports the device you plan to use. Avoid unofficial streams, as they are unreliable, poor quality, and may expose you to security or legal risks.

    What Is TNT and Why People Still Stream It Live?

    TNT is a major U.S. cable entertainment network owned by Warner Bros. Discovery. It is widely known for premium sports coverage, movies, drama series, and event programming. For many viewers, the most important reason to stream TNT live is access to programming that is time sensitive, especially sports and live events.

    In 2026, live TV viewing is increasingly app based, but TNT is still generally distributed as a traditional linear channel. That means you usually need a pay TV subscription of some kind, either through a conventional cable provider or an internet based live TV service. A standard on demand subscription service may not automatically include the TNT live channel.

    Main Ways to Watch TNT Live in 2026

    There are several legitimate ways to stream TNT live. The best option depends on whether you already have TV service, want to cut the cord, or only need TNT for a specific season or event.

    • Live TV streaming services: These are the most common cable replacements. They offer bundles of live channels over the internet and often include cloud DVR.
    • Cable, satellite, or fiber TV: Traditional TV providers often include TNT in expanded basic or entertainment packages.
    • TNT app or website: You may be able to watch live TNT by signing in with a participating TV provider account.
    • Network or sports app integrations: Certain events may appear through partner apps, depending on rights and provider authentication.
    Image not found in postmeta

    Using a Live TV Streaming Service

    For cord cutters, a live TV streaming service is usually the simplest way to get TNT without a traditional cable box. These services work through an app on devices such as Roku, Amazon Fire TV, Apple TV, Google TV, smart TVs, phones, tablets, and computers.

    When comparing services, do not assume TNT is included automatically. Channel lineups change, and some services have different plans, regional restrictions, or promotional packages. Before subscribing, go to the provider’s official channel lookup page and confirm TNT is part of the plan you are selecting.

    Important features to compare include:

    1. Channel lineup: Confirm TNT is included, not just related networks.
    2. Price after promotions: Introductory pricing may increase after the first month or billing period.
    3. Cloud DVR: Useful if you cannot watch live games or shows as they air.
    4. Simultaneous streams: Essential for households with multiple viewers.
    5. Device support: Make sure the app works on your preferred TV, streaming stick, phone, or browser.
    6. Cancellation terms: Month to month plans are generally better if you only need TNT temporarily.

    Watching TNT With Cable, Satellite, or Fiber TV

    If you already have a TV package, the easiest path may be to use your provider’s streaming app. Most major providers allow subscribers to watch live channels away from the cable box, either at home or on the go. In many cases, TNT may be available through the provider’s mobile app, website, or connected TV app.

    This option can be more stable for viewers who already pay for TV service and do not want to manage another streaming subscription. However, availability can vary by provider and location. Some channels may only stream while you are connected to your home network, while others allow out of home viewing. Check your provider’s help center for the most accurate rules.

    Using the TNT App or Website

    The TNT app and official website can be useful if you already subscribe to a participating TV provider. Typically, you install the app or visit the site, choose your TV provider, and sign in with your provider username and password. Once authenticated, you may be able to watch the live TNT feed and selected on demand episodes or clips.

    This method is not usually a standalone subscription. In other words, downloading the TNT app does not necessarily mean you can watch live TNT for free. It is best understood as a companion app for eligible TV subscribers.

    Basic setup steps:

    • Download the TNT app on your streaming device, phone, tablet, or smart TV.
    • Open the app and select Sign In or TV Provider.
    • Choose your TV provider from the list.
    • Enter your provider account credentials.
    • Once verified, select the live feed or available program you want to watch.

    Can You Watch TNT Without Cable?

    Yes, you can watch TNT without traditional cable if you subscribe to a live TV streaming service that carries TNT. This is the most practical cable free option for most viewers. You still pay for a TV bundle, but it is delivered over the internet instead of through a cable box or satellite dish.

    Be careful with the phrase without cable. It does not usually mean free. TNT is a paid TV network, and live access generally requires some form of authorized subscription. If a website promises free TNT live streams with no sign in, no provider, and no recognized streaming service, treat it with caution.

    How to Choose the Best TNT Streaming Option

    The right TNT streaming setup depends on your viewing priorities. A sports fan may need reliable live coverage and DVR. A casual viewer may only need TNT for occasional movies or series. A household may need multiple simultaneous streams and strong parental controls.

    Use the following approach before subscribing:

    1. Identify your must watch content. Are you watching live sports, weekly shows, movies, or special events?
    2. Check the TNT schedule. Confirm that the program you want is actually airing on TNT and not another related channel.
    3. Compare services directly. Look at total monthly cost, not just the advertised base price.
    4. Confirm local availability. Some live TV services vary by ZIP code.
    5. Test during a trial if available. Use any official trial period to evaluate picture quality, delay, and device compatibility.
    Image not found in postmeta

    Watching TNT Sports and Live Events

    TNT is especially important for viewers who follow live sports and event programming. Depending on current rights agreements and seasonal schedules, TNT may carry major games, playoff coverage, studio shows, wrestling, or special broadcasts. Because sports rights can change from year to year, always verify the event schedule through TNT, the league, or your TV provider before purchasing a service only for one game or series.

    Live sports also place higher demands on streaming performance. For the best experience, use a strong broadband connection, preferably with a wired Ethernet connection for your main TV device. If using Wi Fi, position your router close to the streaming device and reduce competing traffic during major events.

    For a smooth TNT live stream, consider these minimum practical recommendations:

    • Internet speed: At least 10 Mbps per HD stream, with more recommended for households using several devices.
    • Device updates: Keep your streaming app, operating system, and device firmware current.
    • Account readiness: Sign in before the event begins to avoid authentication delays.
    • Backup plan: Know whether you can also watch on a phone, tablet, or browser if your TV app fails.

    Can You Watch TNT on Max?

    Some Warner Bros. Discovery programming may appear across related platforms, but live TNT channel access should not be assumed to be included with every streaming subscription. In certain periods, sports or live event access may be offered through add ons or special packages, while the full TNT linear channel may still require a TV provider or live TV bundle.

    The safest advice is to check the current official plan details before subscribing. Look specifically for wording such as live TNT channel, TNT live stream, or the exact event you want to watch. On demand access to selected TNT content is not the same as a live channel feed.

    Watching TNT While Traveling

    If you travel within the United States, your live TV streaming service may still work, but restrictions can apply. Some services adjust local channels based on your temporary location, and others limit how long you can stream outside your home market. TNT, as a national cable channel, is often less location sensitive than local broadcast stations, but provider rules still matter.

    International travel is more complicated. U.S. TV subscriptions may not provide access outside the country because of licensing restrictions. A virtual private network may also violate a service’s terms of use if used to bypass regional limits. For the most reliable answer, consult your streaming provider’s travel policy before leaving.

    Why You Should Avoid Unofficial TNT Streams

    Unofficial streaming sites often look attractive because they claim to offer free live access. In practice, they are a poor substitute for authorized services. These sites may be unstable, overloaded with deceptive ads, or designed to push malware and phishing pages. They may also disappear during major events, leaving you with no dependable way to watch.

    From a legal and security standpoint, authorized providers are the safer choice. They offer better picture quality, customer support, account protection, and predictable access. If you are paying specifically to watch live programming, reliability matters.

    Image not found in postmeta

    Troubleshooting TNT Live Streaming Problems

    If TNT is not working, start with the simplest checks. Confirm that your subscription is active and that TNT is included in your package. Then restart the app, update it, and try another device. If you are using the TNT app, your TV provider authentication may have expired, so sign out and sign back in.

    Common fixes include:

    • Restart your streaming device and router.
    • Update the TNT app or your live TV provider app.
    • Clear app cache where supported.
    • Disable unnecessary VPN or proxy tools.
    • Check whether your provider is experiencing an outage.
    • Try a wired connection for major live events.

    Final Advice for Watching TNT Live in 2026

    The best way to watch TNT live in 2026 is to use an authorized TV provider or live TV streaming service that clearly lists TNT in its channel lineup. Before you subscribe, verify the channel, the event schedule, device support, DVR features, and the total monthly price. If you already have cable, satellite, or fiber TV, try your provider’s app or the official TNT app with TV provider sign in.

    For most viewers, the ideal setup is simple: a reputable live TV streaming service, a reliable internet connection, and a supported device connected to the main television. Taking a few minutes to confirm the details before game night or a season premiere can prevent frustration and ensure you get a stable, legitimate TNT live stream when it matters.

  • How Late Does Amazon Deliver? A Time Guide

    How Late Does Amazon Deliver? A Time Guide

    Waiting for an Amazon package can feel like watching popcorn pop. You know it is coming. You can almost hear the doorbell. But the question is simple: how late does Amazon deliver? The answer depends on your area, your order type, and who is carrying the box.

    TLDR: Amazon usually delivers between 8:00 AM and 8:00 PM. In many areas, drivers may deliver as late as 10:00 PM, especially during busy seasons or for same-day orders. Some grocery and special delivery windows can be later if you picked that time. Always check your Amazon tracking page for the most accurate estimate.

    So, How Late Does Amazon Deliver?

    For most homes, Amazon deliveries happen during the day and evening. A very common delivery window is 8:00 AM to 8:00 PM. That is the “normal” range many shoppers see.

    But Amazon is not always done at 8:00 PM. In many places, deliveries can continue until 10:00 PM. This is more common in cities, suburbs, and busy delivery zones.

    So if it is 8:37 PM and your package says “out for delivery,” do not panic. The box may still be on its way. Your delivery driver may be nearby, probably fueled by coffee and determination.

    Simple rule: if tracking still says out for delivery, there is a good chance it may arrive that evening.

    Amazon Delivery Times at a Glance

    Here is a quick and simple guide. Times can vary, but this gives you a good idea.

    • Regular Amazon packages: Usually 8:00 AM to 8:00 PM.
    • Late evening deliveries: Can arrive up to 10:00 PM in some areas.
    • Same-Day Delivery: Often arrives by 10:00 PM.
    • Amazon Fresh: Arrives during the time window you choose.
    • Whole Foods delivery: Also follows your selected time window.
    • Amazon lockers: Delivery time depends on when the carrier reaches the locker.
    • Business addresses: Usually delivered during business hours.
    Image not found in postmeta

    Does Amazon Deliver After 8 PM?

    Yes, Amazon can deliver after 8 PM. This happens more often than people think. Many Amazon vans keep moving into the evening.

    Late delivery is common when order volume is high. Think holidays. Think Prime Day. Think that magical week when everyone suddenly needs socks, batteries, dog treats, and a waffle maker.

    Amazon may also deliver later when the route is long. A driver may have many stops. Traffic may be bad. Weather may slow everything down. Apartment buildings can also add time. One lost gate code can ruin a driver’s rhythm.

    If your order says it will arrive by 10:00 PM, that is a real delivery window. It is not a joke. It is not Amazon being dramatic. Your package may show up at 9:45 PM.

    What Is the Latest Amazon Usually Delivers?

    For home deliveries, the latest common time is around 10:00 PM. This is usually the cutoff for many Amazon delivery routes.

    That does not mean every driver works until 10:00 PM. It also does not mean every area gets late delivery. Rural areas may see earlier delivery times. Some neighborhoods may have different rules. Local carrier schedules matter too.

    In general, remember this:

    • Before 8 PM: Very normal.
    • 8 PM to 10 PM: Still possible.
    • After 10 PM: Rare for regular packages.

    If it is after 10 PM, your package will usually arrive the next day. Your tracking may update overnight. Sometimes it will say delayed. Sometimes it will simply get a new delivery date.

    Why Is My Amazon Package Coming So Late?

    Late delivery can happen for many reasons. Most are boring. Some are very human.

    • High demand: Too many packages, not enough daylight.
    • Traffic: Delivery vans get stuck like everyone else.
    • Bad weather: Rain, snow, heat, and storms slow routes.
    • Wrong address details: Missing apartment numbers cause delays.
    • Access problems: Gates, codes, dogs, and locked buildings can stop delivery.
    • Carrier delays: UPS, USPS, or another carrier may be handling the order.
    • Package sorting delays: The item may leave the station later than planned.

    Delivery looks easy from the couch. But each package has a little adventure. It travels through warehouses, trucks, scanners, shelves, and finally a doorstep.

    Does Amazon Deliver on Sundays?

    Yes. Amazon delivers on Sundays in many areas. This is one reason Amazon feels so fast. While many people are eating pancakes, packages are still moving.

    Sunday delivery depends on your location. It also depends on the carrier. Amazon’s own delivery network often works Sundays. USPS may also deliver Amazon packages on Sundays in many places.

    If your tracking says Sunday delivery, then yes, your package may arrive that day. It can still arrive in the evening. So keep an eye on the porch.

    Does Amazon Deliver at Night?

    Amazon does not usually deliver in the middle of the night. You should not expect a normal package at 2:00 AM. That would be weird. Also, your doorbell would become your enemy.

    But Amazon does deliver in the evening. A delivery at 9:00 PM is possible. A delivery close to 10:00 PM is also possible in some areas.

    There are also early morning delivery options in some locations. These are special services. They are not the same as standard delivery. If you choose an early delivery window, Amazon will show that option during checkout.

    What Does “Out for Delivery” Mean?

    Out for delivery means your package has left a local facility and is on a vehicle. It is moving toward you. Hooray.

    But it does not mean it is the next stop. The driver may have many stops first. You may be stop number 12. Or 112. Nobody wants to be 112, but someone has to be.

    Amazon tracking may show a map when the driver is close. It may also say how many stops are left. This feature is not always available. When it appears, it is very handy.

    Image not found in postmeta

    What If Amazon Says “Arriving Today”?

    If your Amazon order says arriving today, it is still expected that day. Check the estimated time. It may say “by 8 PM” or “by 10 PM.”

    If it is still early, relax. If it is late evening, watch the tracking. The package may still arrive. If the time passes, Amazon may update the status.

    Sometimes the message changes to running late. That means Amazon knows the package missed the expected time. It may arrive later that night, but most often it comes the next day.

    What If Your Package Is Late?

    First, do not panic. Packages are late sometimes. Even tiny shampoo bottles have complicated journeys.

    Try these steps:

    1. Check tracking: Open your Amazon order page.
    2. Look for updates: See if the delivery date changed.
    3. Check the address: Make sure it is correct.
    4. Look around: Check the porch, mailbox, garage, lobby, and side door.
    5. Ask neighbors: Packages sometimes take short vacations next door.
    6. Wait a little: Some scans show “delivered” before the box appears.
    7. Contact Amazon: If it does not show up, use customer service.

    Amazon usually gives instructions if a package is late. The order page may tell you when you can request help, a refund, or a replacement.

    Can You Choose a Delivery Time?

    Sometimes, yes. It depends on the item and your location.

    For regular packages, you often cannot choose an exact time. Amazon gives an estimated day and sometimes a delivery window.

    For groceries, you usually can choose a window. Amazon Fresh and Whole Foods deliveries often let you pick a two-hour window. In some areas, shorter windows may be available.

    For expensive items, large items, or scheduled deliveries, Amazon may ask you to choose a time. This is common for furniture, appliances, or items that need special handling.

    How to Avoid Late Deliveries

    You cannot control traffic. You cannot control weather. You probably should not control delivery drivers. But you can make delivery easier.

    • Use a clear address: Add apartment, unit, or building numbers.
    • Add delivery notes: Mention gate codes or safe drop spots.
    • Choose a locker: This can help if your building is tricky.
    • Order early: Do not wait until the last possible minute.
    • Use Amazon Day: Group packages for one planned delivery day.
    • Update phone alerts: Get notices when your package moves.

    A good delivery note can save the day. Keep it short. Keep it useful. “Blue house, side porch, gate code 1234” is helpful. “Please hide it from my dog, who judges all boxes” is funny, but less useful.

    Do Different Carriers Deliver at Different Times?

    Yes. Amazon uses its own drivers, but it also uses other carriers. These can include USPS, UPS, and other local delivery partners.

    Each carrier has its own schedule. UPS often delivers into the evening. USPS delivery times can vary by route. Amazon drivers may deliver later than some traditional carriers in certain areas.

    That is why tracking matters. The carrier listed on your order can give clues. If Amazon is delivering it directly, late evening delivery may be more likely.

    Holiday Delivery Can Be Extra Late

    During the holidays, delivery gets wild. Packages fly around the country like reindeer with barcodes.

    More orders mean longer routes. Longer routes mean later stops. So yes, Amazon deliveries may arrive later in November and December. Prime Day and big sale events can also create delays.

    If you need a gift by a certain date, order early. Do not trust “future you” to stay calm. Future you will be refreshing tracking every four minutes.

    Image not found in postmeta

    Final Answer: How Late Should You Wait?

    If your Amazon package is out for delivery, wait until the end of the shown delivery window. For many orders, that means 8:00 PM. For others, it may mean 10:00 PM.

    If it is before 10:00 PM and tracking still looks active, your package may still arrive. If it is after 10:00 PM, it will probably come the next day.

    The best guide is always your Amazon tracking page. It knows more than your doorbell. It knows more than your porch. It may even know more than your excited dog.

    So take a breath. Keep the porch light on. Check the tracking. Your package is probably still making its way through the grand little obstacle course of modern delivery.

  • Where Did the National Educational Television Logo Originate?

    Where Did the National Educational Television Logo Originate?

    To understand where the National Educational Television logo originated, it is necessary to look beyond the graphic itself and examine the institution behind it. National Educational Television, usually shortened to NET, was the direct predecessor of PBS and played a major role in shaping public broadcasting in the United States. Its logo grew out of a period when educational television was trying to look more unified, modern, and national in scope.

    TLDR: The National Educational Television logo originated from the branding needs of NET, the American educational television network that developed from the Educational Television and Radio Center. Its visual identity emerged during the late 1950s and early 1960s as the organization shifted from a program distributor into a recognizable national network. The logo was closely tied to the network’s move toward modern public-service broadcasting and its desire to appear professional, trustworthy, and distinct from commercial television. While no single famous designer is universally credited, the logo’s origin belongs to the broader institutional history of American public television.

    The Roots of National Educational Television

    National Educational Television did not appear overnight. Its origins trace back to the early 1950s, when educators, philanthropists, universities, and cultural organizations began exploring television as a tool for public learning. Before cable channels and streaming platforms, television was still a young medium, and many believed it could become a powerful classroom, lecture hall, and cultural stage.

    The organization that eventually became NET began as the Educational Television and Radio Center, established in 1952 with support from the Ford Foundation. It was first based in Ann Arbor, Michigan, and its main purpose was not to operate like a traditional commercial network. Instead, it distributed educational programs to noncommercial stations around the country.

    At this early stage, the organization was more of a service center than a network with a strong public image. Branding was not the first concern. The priority was producing and circulating programs about science, literature, public affairs, history, music, and civic life. However, as educational television expanded, a recognizable identity became increasingly important.

    Image not found in postmeta

    From Educational Center to National Network

    The logo’s origin is closely connected to the organization’s evolution. In 1958, the Educational Television and Radio Center moved its headquarters to New York City and became the National Educational Television and Radio Center. This move signaled a broader ambition. The organization was no longer just a clearinghouse for educational programming; it was becoming a national presence.

    By the early 1960s, the name was shortened to National Educational Television. The initials NET became central to its public identity. This abbreviation was practical, easy to remember, and visually adaptable. Like the better-known commercial networks CBS, NBC, and ABC, NET needed a compact name that could appear on screen, in print, and in station materials.

    This is where the logo’s origin can be understood most clearly. It came from the need to give a growing educational network a consistent visual signature. The mark was not merely decoration; it represented an attempt to show that educational television could be as polished and serious as commercial broadcasting, while serving a very different mission.

    Where the Logo Originated

    The National Educational Television logo originated within the institutional branding of NET during its transformation into a national educational broadcaster. Its roots can be traced to the organization’s rebranding period in the late 1950s and early 1960s, especially after the move from Ann Arbor to New York and the adoption of the shorter NET name.

    Unlike some famous television logos, the NET logo is not commonly associated with one widely documented individual designer. Public records and broadcast histories usually discuss the network’s programming, funding, and political importance more than the specific authorship of its visual identity. For that reason, the most accurate answer is that the logo originated from NET’s internal and broadcast identity needs, rather than from a single celebrated design story.

    The logo was shaped by the visual language of mid-century television. During that period, broadcasters favored simple, bold, high-contrast marks that would reproduce clearly on black-and-white television screens. A logo had to be readable at low resolution, recognizable in station identifications, and suitable for use before or after programs. NET’s identity followed this practical design logic.

    The Influence of Mid-Century Broadcast Design

    The NET logo reflected the aesthetics of its time. Mid-century broadcast graphics often emphasized geometry, clarity, and modernism. Television logos needed to communicate quickly, because viewers might see them for only a few seconds. They also had to work under technical limitations, including fuzzy reception, small screens, and black-and-white display.

    NET’s branding therefore leaned toward simplicity. The use of the initials NET helped create an immediate identity. Those three letters carried the meaning of the full name while also suggesting a network: a connected system of local stations sharing programming and purpose. In that sense, the logo was both a name and a concept.

    Its origin was not only graphic but symbolic. It represented the idea that educational television could form a national “net” of knowledge, linking classrooms, homes, universities, and cultural institutions. The initials worked especially well because they subtly reinforced the organization’s structure: a network of stations serving the public.

    Image not found in postmeta

    Why NET Needed a Strong Logo

    NET operated in a media environment dominated by commercial networks. Commercial broadcasters had memorable identities and strong visual systems. For NET to compete for attention and credibility, it also needed a polished image. A clear logo made its programming feel official and dependable.

    The network’s mission was serious. It aired documentaries, lectures, arts programming, public affairs discussions, and cultural features. Programs such as NET Journal, Black Journal, and other public-interest broadcasts helped establish NET as an influential voice in American television. A consistent logo helped connect these programs under a shared institutional identity.

    The logo also served local stations. Many educational stations relied on NET for national content, and the logo helped viewers recognize when a program came from the wider educational television network rather than from a local source. This distinction mattered because NET was building a national reputation for thoughtful, noncommercial programming.

    The Logo as a Sign of Public Trust

    The origin of the NET logo cannot be separated from the values of public broadcasting. NET was created to serve education, culture, and civic discussion. Its visual identity needed to suggest seriousness without feeling dull, and professionalism without appearing commercial or flashy.

    In this respect, the logo was part of a larger effort to define what public television should look and feel like. It had to be modern enough for television but restrained enough to match the network’s educational purpose. The design communicated that NET was not selling soap, cars, or cigarettes; it was offering knowledge, debate, performance, and public service.

    This made the logo an important bridge between mission and medium. Television was often criticized as shallow or commercial, but NET used the same medium to present ideas, scholarship, and culture. Its logo gave that mission a visible stamp.

    Connection to PBS

    NET’s logo also matters because of what came after it. In 1970, NET was replaced by the Public Broadcasting Service, better known as PBS. PBS inherited much of the educational television movement that NET had helped build, although PBS developed a different structure and later adopted its own famous logos.

    The transition from NET to PBS marked a turning point in American public broadcasting. NET had sometimes taken strong editorial positions and produced controversial public-affairs programming. PBS was designed as a new system for distributing public television content more broadly among member stations. Even so, PBS stood on the foundation NET had created.

    The NET logo, therefore, originated in the pre-PBS era but belongs to the same historical lineage. It was one of the visual ancestors of American public television branding. Before viewers recognized the PBS “P-head” symbol, many recognized NET as the mark of national educational broadcasting.

    Image not found in postmeta

    Why the Logo Still Interests Viewers

    Today, interest in the National Educational Television logo often comes from media historians, logo enthusiasts, archivists, and viewers who discover old broadcast clips online. Vintage television logos have become cultural artifacts. They reveal how networks wanted to be seen and how design responded to the technology of the era.

    The NET logo is especially interesting because it represents a vanished institution that still casts a long shadow. Although NET no longer exists, its influence survives through public television, documentary broadcasting, educational programming, and the idea that television can serve the public good.

    For some viewers, the logo evokes nostalgia. For others, it is a piece of design history. For historians, it is evidence of a moment when American television was being reimagined as something more than entertainment and advertising.

    What the Logo Ultimately Represents

    The National Educational Television logo originated from a practical need, but it came to represent something larger. It marked the identity of a network committed to learning, culture, and public affairs. It appeared at a time when educational television was trying to prove that it belonged on the national stage.

    Its origin lies in the growth of NET from a Ford Foundation-supported educational program distributor into a national broadcaster based in New York. The logo emerged as part of that transformation, giving the organization a concise and recognizable public face.

    Although the exact designer may not be widely documented, the logo’s historical source is clear: it came from the rise of American educational television and the effort to create a national, noncommercial broadcasting identity before PBS. In that sense, the NET logo originated not just in a design office, but in a movement that believed television could educate, challenge, and enrich the public.

    FAQ

    • What was National Educational Television?
      National Educational Television, or NET, was an American educational television network and program distributor. It operated before PBS and helped establish the foundation for modern public television in the United States.

    • Where did the NET logo originate?
      The logo originated from NET’s branding efforts as the organization evolved from the Educational Television and Radio Center into a national educational broadcaster. Its origin is tied to the network’s rebranding in the late 1950s and early 1960s.

    • Was the NET logo created in Ann Arbor or New York?
      NET’s institutional roots began in Ann Arbor, Michigan, but its stronger national identity developed after the organization moved to New York City. The logo is most closely associated with the New York-era transformation into National Educational Television.

    • Who designed the National Educational Television logo?
      A single universally credited designer is not widely documented in common public histories. The logo is generally understood as part of NET’s institutional broadcast identity rather than the work of one famous named designer.

    • Why was the logo important?
      The logo helped NET appear professional, unified, and recognizable. It identified programs as part of a national educational network and distinguished NET from commercial broadcasters.

    • How is NET connected to PBS?
      NET was the predecessor of PBS. In 1970, PBS replaced NET as the main national public television system, though PBS built upon the educational broadcasting foundation that NET had established.

    • Why do people still look up the NET logo today?
      People remain interested in the NET logo because it is part of television history. It represents the early era of public broadcasting and the visual identity that came before PBS became widely known.

  • How to Pair & Program Roku Remote to TV

    How to Pair & Program Roku Remote to TV

    Roku streaming players and Roku TVs are built to be simple, but setting up the remote can still confuse a user when the remote does not respond, the volume buttons do not work, or a replacement remote needs to be paired. The process depends on whether the remote is a basic infrared model or a voice remote that connects wirelessly. With the right steps, most Roku remotes can be paired and programmed to control a TV in just a few minutes.

    TLDR: A Roku remote can be paired by inserting fresh batteries, turning on the Roku device or Roku TV, and using the pairing button if the remote is a voice model. To program a Roku remote for TV power and volume, the user should open Settings, go to Remotes & devices, and follow the TV control setup prompts. If the remote will not pair, restarting the Roku device, replacing batteries, and re-pairing usually solves the problem. Basic infrared Roku remotes do not need pairing but must have a clear line of sight to the device.

    Understanding the Different Types of Roku Remotes

    Before a person can pair or program a Roku remote, it helps to know which type of remote is being used. Roku remotes generally fall into two main categories: simple infrared remotes and Roku voice remotes.

    A simple Roku remote uses infrared, often called IR. It works like a traditional TV remote and sends a signal directly to the Roku device. It does not need to be paired. However, it must be pointed at the Roku device, and there must be nothing blocking the signal.

    A Roku voice remote connects through a wireless signal and usually includes a microphone button for voice search or voice commands. This type of remote must be paired with the Roku device or Roku TV. Some voice remotes also include TV power, volume, and mute buttons, which can be programmed to control the television.

    Image not found in postmeta

    How to Tell If a Roku Remote Needs Pairing

    A Roku remote needs pairing if it is a voice remote, a replacement remote, or a remote that has stopped communicating with the device after a reset or power outage. The easiest clue is the presence of a pairing button or a voice button with a microphone icon.

    On many Roku voice remotes, the pairing button is located inside the battery compartment. On newer rechargeable Roku remotes, the pairing button may be located on the back or near the charging port. If the remote has no pairing button and no microphone button, it is probably an infrared remote and does not pair in the traditional sense.

    How to Pair a Roku Voice Remote During Initial Setup

    When a Roku device is being set up for the first time, the pairing process usually starts automatically. The user should follow the on-screen instructions and keep the remote near the Roku device.

    1. Turn on the TV and select the HDMI input connected to the Roku device.
    2. Insert fresh batteries into the Roku remote, making sure the positive and negative ends are correctly placed.
    3. Wait for the pairing screen to appear. Roku often detects the remote automatically.
    4. If pairing does not begin, press and hold the pairing button for about 5 seconds.
    5. Release the button when the status light begins flashing.
    6. Wait until the TV displays a message confirming that the remote has paired.

    Once paired, the remote should be able to move through menus, select apps, and control playback. If the remote includes TV control buttons, the user may then program it to control TV volume and power.

    How to Pair a Replacement Roku Remote

    A replacement remote can be paired even if the original remote is lost or broken. If the Roku device is already connected to Wi-Fi, the user may also use the Roku mobile app as a temporary remote. This can make the process easier, especially when navigating settings is required.

    To pair a replacement Roku voice remote, the user should first restart the Roku device. This can be done by unplugging the power cable, waiting about 10 seconds, and plugging it back in. When the Roku home screen appears, the user should press and hold the pairing button on the replacement remote until the pairing light flashes.

    If pairing is successful, a confirmation message should appear on the screen. If no message appears, the user should move the remote closer to the Roku device and repeat the process. Fresh batteries or a fully charged remote are important because low power can interrupt pairing.

    How to Program a Roku Remote to Control TV Power and Volume

    Pairing a remote to the Roku device is not the same as programming it to control the TV. Pairing allows the remote to communicate with Roku. Programming TV controls allows the remote to manage power, volume, and sometimes mute for the television.

    To program TV controls on a compatible Roku voice remote, the user should follow these steps:

    1. Press the Home button on the Roku remote.
    2. Scroll to Settings.
    3. Select Remotes & devices.
    4. Choose Remotes.
    5. Select the connected Roku remote.
    6. Choose Set up remote for TV control.
    7. Follow the on-screen instructions as Roku detects the TV brand.
    8. Confirm whether music or sound stops playing during the test.
    9. Finish setup when Roku confirms that the remote can control the TV.

    During setup, Roku plays test audio and asks whether the sound is still audible. The user should answer carefully. These prompts help Roku find the correct remote code for the TV. If the first code does not work, Roku may try additional codes until it finds the right one.

    Image not found in postmeta

    How to Pair a Roku Remote Without a Pairing Button

    Some Roku remotes do not have a visible pairing button. If the remote is an infrared remote, it does not need pairing. The user only needs to insert working batteries and point it directly at the Roku player. If the remote does not work, the issue may be blocked line of sight, weak batteries, or an incompatible remote.

    However, some newer Roku voice remotes may not have a traditional battery-compartment button. In that case, the user may need to press a button combination to enter pairing mode. Depending on the model, holding the Back button and Home button together for about 5 seconds may start pairing. The status light should flash when pairing mode begins.

    If there is uncertainty, the user should inspect the remote for a small light or recessed button. A rechargeable remote may need to be charged before pairing can start.

    Using the Roku Mobile App as a Temporary Remote

    When a physical remote is missing or not working, the Roku mobile app can serve as a temporary remote. The app is available for smartphones and can control a Roku device if both the phone and Roku are connected to the same Wi-Fi network.

    To use the app, the user should open it, select the Roku device from the device list, and tap the remote icon. From there, the app can navigate menus, launch channels, and open settings. This is especially helpful when programming a replacement remote or checking the network connection.

    The app cannot always help if the Roku device is not connected to Wi-Fi or has been factory reset. In those cases, a compatible physical remote may be required to complete setup.

    Troubleshooting Roku Remote Pairing Problems

    If a Roku remote will not pair, the problem is usually related to power, distance, interference, or the pairing process itself. Most issues can be fixed by restarting the Roku device and resetting the remote connection.

    • Replace the batteries: Weak batteries may allow lights to flash but still prevent successful pairing.
    • Restart the Roku device: Unplug the power cable, wait 10 to 15 seconds, and plug it back in.
    • Move the remote closer: The remote should be within a few feet of the Roku during pairing.
    • Remove obstructions: For infrared remotes, the path between the remote and Roku must be clear.
    • Try pairing again: Hold the pairing button until the light flashes, then wait for the on-screen message.
    • Check for interference: Wireless devices, metal cabinets, or dense entertainment centers may affect performance.

    If the remote is rechargeable, it should be charged for at least 30 minutes before another pairing attempt. If it still does not respond, the remote may need to be reset or replaced.

    How to Reset a Roku Remote

    Resetting a Roku remote can help when pairing fails repeatedly. The process is simple and often restores normal communication between the remote and device.

    1. Unplug the Roku device from power.
    2. Remove the batteries from the remote, if it uses removable batteries.
    3. Wait at least 10 seconds.
    4. Plug the Roku device back into power.
    5. When the Roku home screen appears, reinsert the batteries.
    6. Press and hold the pairing button until the status light flashes.
    7. Wait for the remote to reconnect.

    For rechargeable remotes, the user should restart the Roku device and hold the pairing button or required button combination until the light flashes. If the remote remains unresponsive, charging it with a reliable cable and power source may help.

    Image not found in postmeta

    Programming Roku Remote for Different TV Brands

    Roku supports many popular TV brands, including Samsung, LG, Sony, TCL, Hisense, Vizio, Philips, and others. The programming process is automatic, so the user usually does not need to enter a code manually. Roku identifies the TV brand through the HDMI connection or setup process and tests available codes.

    If the TV brand is not detected correctly, the user may be asked to select it manually. The user should make sure the TV speakers are not muted during the test. If the sound test is answered incorrectly, the wrong code may be saved, and the volume or power buttons may not work.

    When programming fails, running Set up remote for TV control again often solves the problem. A TV software update or Roku system update may also improve compatibility.

    Important Tips for a Smooth Setup

    To avoid problems, the user should keep the setup environment simple. The Roku device should be powered directly from a wall outlet when possible, rather than from a low-power USB port on the TV. The remote should be close to the device, and the TV should be set to the correct input.

    • Use fresh batteries before starting setup.
    • Keep the remote close to the Roku device during pairing.
    • Do not press too many buttons while pairing is in progress.
    • Answer sound test prompts carefully when programming TV controls.
    • Update Roku software if remote features are not working correctly.

    It is also worth remembering that not all Roku remotes can control TV power and volume. A basic Roku remote may only control the Roku interface. If TV control is needed, a compatible Roku voice remote with power and volume buttons is required.

    When a Roku Remote May Need to Be Replaced

    If the remote does not light up, does not pair after several attempts, or drains batteries quickly, it may be defective. Physical damage, battery corrosion, and worn buttons can also prevent normal operation. In that situation, replacing the remote is usually more practical than continuing to troubleshoot.

    When buying a replacement, the user should confirm compatibility with the specific Roku model. Some older Roku devices may not support every modern Roku voice remote. Roku TVs may also work with brand-specific remotes, universal remotes, or official Roku remotes, depending on the model.

    FAQ

    Does every Roku remote need to be paired?

    No. A simple infrared Roku remote does not need pairing. It only needs working batteries and a clear line of sight to the Roku device. Roku voice remotes, however, must be paired.

    Where is the pairing button on a Roku remote?

    On many models, the pairing button is inside the battery compartment. On rechargeable models, it may be on the back or near the charging port. Some newer remotes use a button combination instead of a dedicated pairing button.

    Why will the Roku remote control the Roku but not the TV volume?

    The remote may be paired to Roku but not programmed for TV control. The user should go to Settings, then Remotes & devices, choose the remote, and select Set up remote for TV control.

    Can a Roku remote be paired without Wi-Fi?

    Yes, a Roku voice remote can usually be paired directly with the Roku device without Wi-Fi. However, some setup features and the Roku mobile app require the Roku device and phone to be on the same network.

    What should be done if the pairing light does not flash?

    The user should replace the batteries or charge the remote. If the light still does not flash, the pairing button may be damaged, or the remote may need to be replaced.

    Can the Roku mobile app replace a physical remote?

    The Roku mobile app can work as a remote when the phone and Roku device are on the same Wi-Fi network. It is useful as a temporary solution, but a physical remote may still be needed for initial setup or network changes.

    Why does the Roku remote stop working after the TV is turned off?

    The Roku device may be losing power if it is plugged into the TV USB port. Using a wall power adapter can keep the Roku powered and help the remote reconnect more reliably.